I first have to say that I got a jump on spring and started organizing in February. I was just ready to do it. I couldn't handle the clutter any longer. Notice I said organizing and not cleaning. I think it's too overwhelming to organize and spring clean at the same time. So, I love to organize first and deep clean second. Here's an example of how I did it.
Step 1: First things first, you will need some supplies. You probably have all these items laying around the house (except for maybe the label maker). If you don't have a label maker, I highly recommend you go buy one. They are very inexpensive and they are a must if you want to have an organized home. I've had mine for about 7 years and I believe it was about $20. You can always borrow from a friend and just buy the labels that go in it.
You will probably need more than one donate and sell box and an even bigger trash can, but this is what I had laying around the house. You get the picture. If you don't think you will get around to having a garage sale, the best thing to do is put it in the donate pile.
Tip: Ask yourself these 3 questions when you are going through the house. Do you love it? Do you use it? Does it add value to your life? If you can't answer yes to all 3 things, it's time to let it go. I'll talk more about the "stuff" in our lives at a later post, but for now this will get you started.
Step 2: I made a list of all the rooms in the house that need to be organized and listed it by floors. So for example if you had a two story house, you would list all the rooms and closets on the second floor and then those on the first floor. I started from the top of the house down, but you can do the opposite. Whatever works best for you. A great rule is always start with one room and don't move on to the next room until you are finished with that room. Step 3: As you are organizing a room keep your pen and paper handy. You can use these tools to write down things you need to purchase or things you need to do. For example, when I was organizing our master bathroom, I ran across items we were out of that I needed to buy. So I wrote those down on the list.
i.e. Brian needs travel shaving cream, toothbrushes, stock up on shampoo, etc. You get the picture. Then I added that to my shopping list. I then took a sticky note and wrote, "hang towel bar" and stuck it on the back of the bathroom door. Now if you have alot to do in that room you may have yellow stickies all over the wall, but at least you will remember that it needs to be done. :)
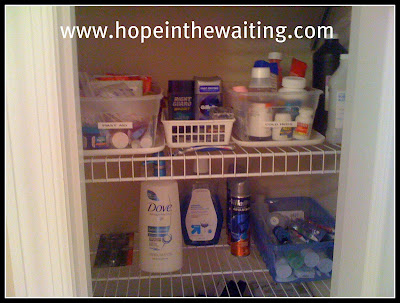
Step 4: Time to go shopping. This is the fun part and it doesn't have to cost alot of money. I am a lover of plastic bins and glass containers. My husband will attest to that. The Dollar Store has become one of my favorite places to find plastic containers because they are only $1. I also get my glass containers and bins from Walmart because they seem to have the lowest price. I will show you how I use the glass containers in my pantry reveal coming up next month. But for now, here is an example of Brian's closet in our bathroom.
As you can see, I have one clear bin for First Aid items, one for medicines and one for toothbrushes & toothpaste. I stock up on shaving creme, deodorant, shampoo, toilet paper and Kleenex when I have coupons at Costco. Tip: Take your items out of the cardboard box they come in and store them in see through containers so you know when you are running low on something. That way you will never be out of something you need.
I hoped this has been helpful to you. I probably could write another 3 pages on today's tip, but I want to keep it as short as possible and still give you everything you may need to organize your home. If you have any questions, please feel free to leave me a comment and I will be happy to answer them. If there is something you want to see organized, please let me know that too. I love to hear from you. Now get to gettin' and have fun doing it.


0 comments:
Post a Comment