Day 4- Festive Gluten Free 4th

Today is the last day of our series. :(  I want to give a big shout out to my friend Calie at Broccoli Cupcake for joining me this week.  I am dying to make the Grilled Red Potato Salad she had on her blog yesteday.  It looks so yummy.

I wanted to go out on a sweet note.  I've been eating this dessert since I was a kid.  My mom used to make it all the time.  Not only is it incredibly yummy, but it is so easy to make.  It takes just 5 minutes.

I am going to be showing you how to make a gluten free peach dump cake, which is my hubby's favorite. You can make apple or cherry as well.  Remember, this is gluten free, not sugar free or fat free.  :)

Here's what you need:

1 9X9 glass or non stick pan (I lightly coat the bottom of the pan with some coconut oil or butter)
1 can or jar of peaches (We get ours from Costco, 4 jars to a pack. I like them because they are in extra light syrup and I love reusing these jars.)
1 gluten free vanilla cake mix (Available at Whole Foods.  You will be able to make this recipe 3 times using the one bag.)
1/2 stick of Organic butter
Optional: 3 Tbsp of Organic Turbinado Raw Cane Sugar (Feel free to skip this part if you are trying to watch your sugar intake.  You don't need it.  It just adds an extra crunch to the dish.
Preheat the oven to 350 degrees.  Take peaches and drain the syrup and give them a light rinse.


Dump the peaches in the bottom of the pan or glass dish and spread them out so they coat the bottom.  Pour 2 cups of the gluten free vanilla cake mix over the peaches.  You want the peaches to be covered with the cake mix.  If after 2 cups of cake mix you still see peaches, you can add a little more.  Optional: Add 2-3 tbsp of the Turbinado Sugar over the top.  Melt a half stick of organic butter and pour over the top of the cake mix.  Here's what it looks like as it's going into the oven.  (I actually melted a whole stick of butter by accident, I'm tired, so I dumped the whole stick over the top.)  Paula Deen, eat your hear out. 

Bake on 350 for 30-40 until golden brown.  Best if served warm with a scoop of vanilla ice cream.  Here's the finished product.  I made this for my friend Kelly over at Faithful Provisions and her family loved it.  She ended up making it to take to a party she was going to the next week.  I promise it does not disappoint.  The best part is that my sweet Sydney Kate can enjoy some yummy dessert and there is no worries about gluten.

I hope we've inspired you this week.  Have a safe and happy 4th.

Day 2- Festive Gluten Free 4th

I hope you enjoyed yesterday's post by my friend Calie, over at Broccoli Cupcake.  Today I am going to show you a cute and fun craft you can do with your kids for the 4th of July.  I saw this idea last year on the Better Home and Gardens website and really wanted to do it, but just didn't get around to it.  This year, I decided it was time to try it.                        (photo courtesy of BHG)

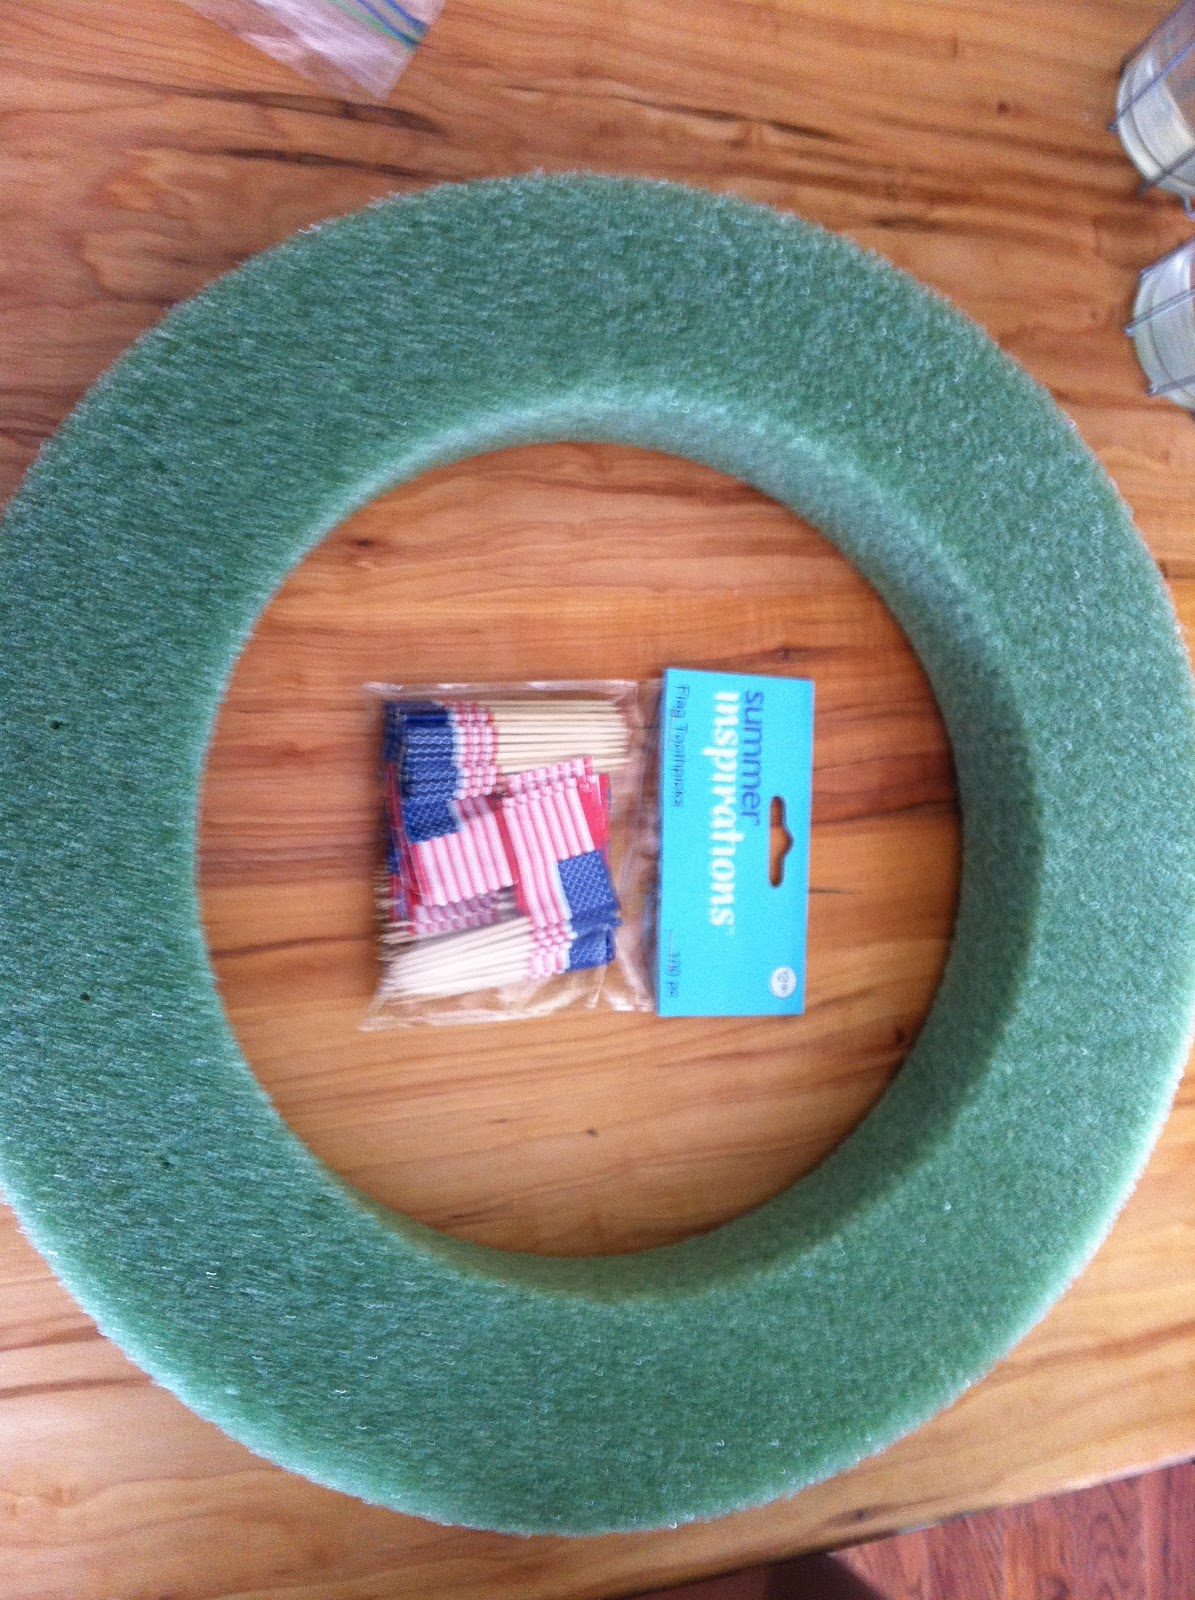
The project is pretty easy and inexpensive.  It was under $10 to make.  I went to Joann's and picked up four packets of flag toothpicks at $1.19 each (they were on sale) as well as a 12 in styrofoam wreath.  You don't want to get the wreath too big.  I bought a 16 in wreath first and realized there was no way I would have enough toothpicks to cover the entire things, so I went back and bought a 12 in.  You can also find the wreaths at Michael's and Hobby Lobby.  I bought the rest of the toothpicks that they had at my local Joann's, but I know Party City carries them as well.

Here's what I started with:
The green wreath was 16in so when I exchanged it for the 12 in, it was white.  (Forgot to take the before pic.  Sorry.)  I decided it was best that I spray paint it a Navy blue so that it would look better if I had some blank spaces that I couldn't fill in with the flags.  Highly recommend this step.  If you don't have spray paint on hand, craft paint would do the trick too.
Then it was on to the painstaking task of putting the little toothpicks into the styrofoam.  It actually was kind of fun.  The girls helped me at the beginning.  Then they quickly got bored and decided they'd had enough.  Here's a tip.  You want to put the flags in on an angle and not straight up and down.  I figured it out after about 100 toothpicks in that it didn't look right.  All I saw was the top of the toothpicks.

The final product.  What do you think?  I really like the way it turned out and it was alot of fun to involve the girls.  I may even leave it up all summer long.

Don't forget to check out Broccoli Cupcake tomorrow.  Calie will be showing you healthy and gluten free side dishes for your 4th of July BBQ.

Day 1-Festive Gluten Free 4th

I am so excited to announce that I am teaming up this week with one of my good friends, Calie, from Broccoli Cupcake.  First of all, how cute is that name.  I just love it.  Her slogan is
"Where Healthy, Meets Happy."  Here is Calie with her husband and sons.

I've known Calie now for over 7 years.  We were both pregnant at the same time, she with her son and me with Brooklyn.  We also both share a love of organic living and helping other people.

This week we are going to show you how you can have a healthy, gluten free 4th of July.  You might remember me saying that we took Sydney off of gluten to see if it would help her tummy issues.  In doing so, I have had to come up with alternative ways to eat the same foods that she enjoys, minus the gluten.

Calie is going to be showing you how to prepare those main dishes we all love, but do it in a healthy and organic way.  So hop on over to Broccoli Cupcake and check it out.  I hope you enjoy it! 


Make sure you check back with me tomorrow.  I will be showing you a fun American flag craft you can do with your kids.
 

Design by Custom Blog Designs/FreeStyleMama Creations